Note: This is a step by step guide on how to create a Ethereum wallet so you can get ready to become a Crowdholding supporter during our Pre-ICO / ICO. If you already have a wallet, you can move on to step two, on how to purchase Ethereum (ETH) and moving your ETH to your wallet. If you wish to learn more about our company or our ICO click here.
In this step by step guide, we will show you how to create a new Ethereum wallet. You will need a wallet to participate in the ICO and if you want to know more about what a wallet is or how it works, You can click here for a beginners guide into wallets. Also it is not essential that you make a wallet created through MyEtherWallet, as long as it is ERC20 compatiable (such as Mist or Metamask). If you are not sure, contact us on our slack channel and we will work it out together!
The reason we decided to use MyEtherWallet in this guide is because it’s very quick, easy and free. So let’s begin!
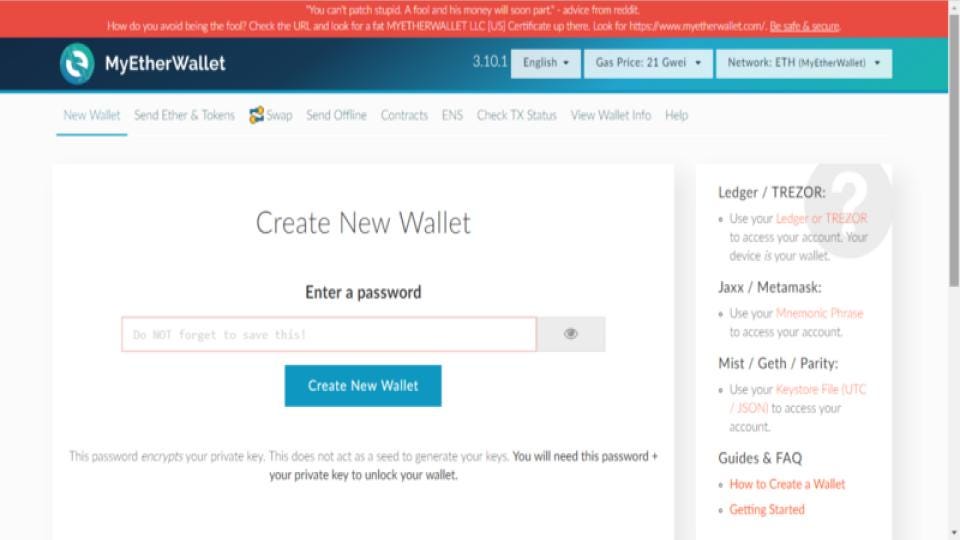
Step 1
To start the process of creating a wallet, go to the websitehttps://www.myetherwallet.com/ , where you will be greeted with the landing page. Once you are on this page, it is time to create a password. We suggest that you pick a reasonably long password (at least 20 characters).
Once you have done this click on the button “Create New Wallet”
Step 2
Once you have created your password, it will ask you to download your KeyStore file. This file is very important, so make sure to the save the file somewhere safe and also to back it up in another location (we suggest not on the same computer, or writing it down and storing it somewhere). The file will start with a UTC — 2017 (the year it was created) and will have a long string of numbers and letters.
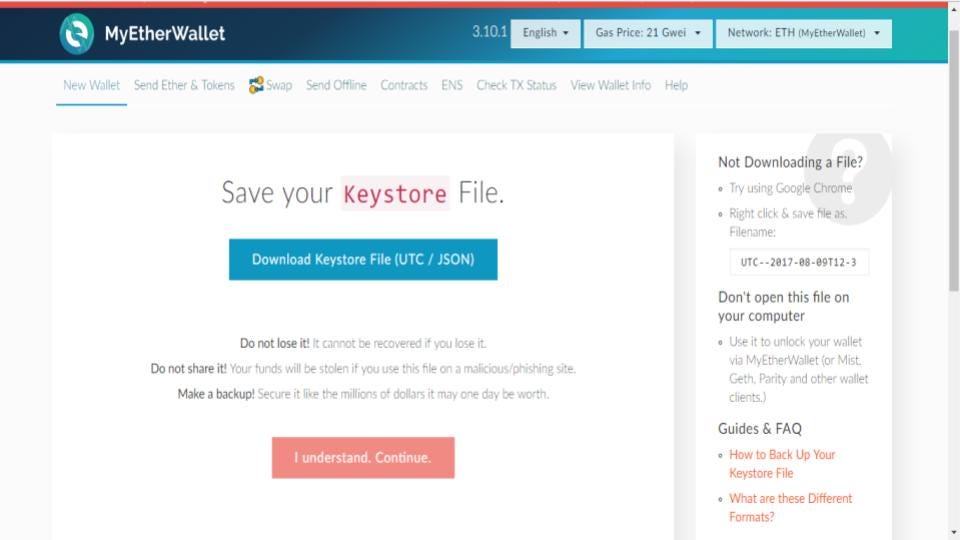
Step 3
After saving the keystore file, click on the “I understand continue” button underneath where you can download your keystore file.
The following page will show your private key information. The private key can unlock your wallet if you forget your password.It is vital that you store this information, if you lose access to your private key you will not be able to access your tokens.
For this reason, we suggest printing out the key so you have it in paper form which you can easily do by clicking the print button. Also do not share this information with anyone! Whoever has your private key will have complete access to your wallet.
Once you have printed the private key, click on the save address button.

Congratulations are in order! You have just finished creating a wallet.
Accessing your wallet
Wherever you want to access your wallet, simply come back to this page and you will be greeted with the options to unlock your wallet. If you ever want to access your wallet, you will need to unlock it first.
To unlock your wallet, you will need the keystore file you previously downloaded at the start of the tutorial. Simply choose “Keystone File (UTC / JSON)” from the list of options. In the middle column, you will see “SELECT WALLET FILE”. Click on that button and upload the keystone file you downloaded. Once this has been selected, you have to enter your password (The one you created at the very start) If the data matches, the unlock button will appear

To check your balance, you will have to select “View Wallet Info” on the top scrollbar, you will have to re-enter your information (safety first!), from there you can see all your information and what your balance is.
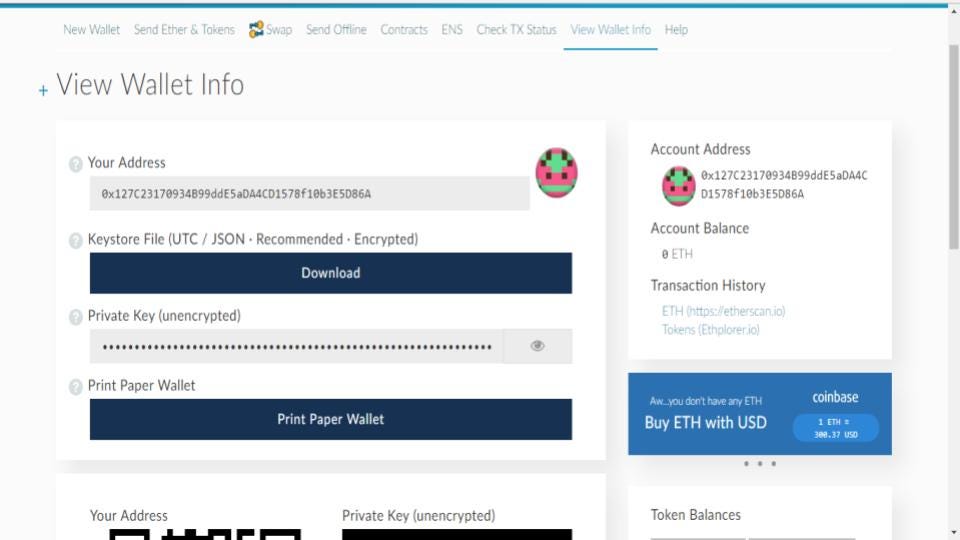
The “ox” number is your public address and works similarly to a bank account number. Therefore it is okay for other people to know this address, as they will need to to send ETH or tokens to your account.
A quick reminder, DO NOT give out your keystore file, private key or your password. If any transactions need completing, they only need you public address (number starting with ox).
In our next part, we will be focusing on how to fill your wallet with ETH and the process of transactions. Thank you for reading.